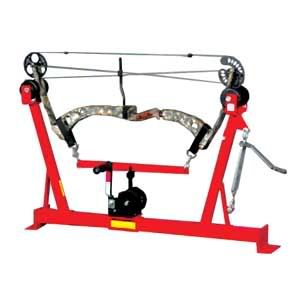
Bow Press
There are lots of options here. You can go portable with something like the Bowmaster, or get a full blown shop style setup with the Apple Press and stand. There are tons of options in prices ranging from ~$40 all the way into the thousands. The most important thing is to make sure it will work for your bow. Some presses will not work for split limb bows without an adapter that you will have to buy. Some will not press parallel limb bows without being modified. The difference here is in the way the limbs flex on a parallel vs. non-parallel bow. Parallel limbs flex vertically when the bow is drawn due to the fact that they are essentially in a horizontal plane. Non-parallel limbs will flex somewhere between vertical and horizontal, roughly at an angle towards the nock of the string. Due to this difference, if you try and press a parallel limb on a press not designed for it, it will not press fully and could damage the bow. Same applies to the non-parallel limb on a parallel press.
Presses are used for many things. Anytime you need to modify anything attached to the string, you will need to press it so that you can separate the strands of the string to get the accessories in between them. You need it to adjust cam timing (the rotation of the cams) or change draw length mods. Also for when it comes time to change out aging strings and cables, or repair damaged ones. You shouldn't need it that often, but when you do need it there is no substitute.
Examples....
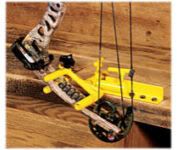
Bow Vise
A simple device for holding your bow. It can be pretty hard to work on a bow unless you have a third arm!! That's where the vise comes in. A simple one will hold your bow in one position allowing you to work on your bow. A better one will allow you to rotate the bow in many directions once it is mounted. This will allow you to get the bow in just the right position for the work you need to do.
Example....
Allen Wrenches
or hex keys, whatever you want to call them. You know what these things are. You will need multiple sizes. A decent standard set from any hardware store will do. I have never run across any metric, yet. It couldn't hurt, though, to have a set of those just in case.
Screwdrivers
You won't need them all that often, but you will need them. Have a simple set of common and philips on hand.
Levels
Not your daddy's variety. A string level, and an arrow level.
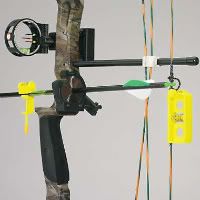
These will help you in setting up your rest. Place the string level, where else.... on the string!!! Use it to make sure your bow is level vertically (up and down for those that always get them mixed up) when in the vise. Now you place the arrow level on the arrow and adjust your rest until your arrow is perfectly horizontal.
Nock Set Pliers and Brass Nocks
Brass nocks are useful for many things. You can use them to attach your drop away rest cord to your cable. Place them above and below a kisser button to secure it in place. And of course even use them to mark your nock point.
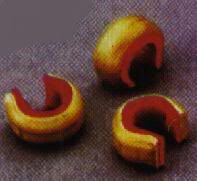

Nock set pliers, obviously, are for attaching those little brass guys. A good pair will also have a lever to pry them off with.
Draw Length Arrow
Basically a long, unfletched arrow with markings toward the end. These markings are distance measurements that allow for checking draw length. It can be used for Three functions. First, draw it back with a recurve bow, or compound with no draw stop, and you can find your draw length (someone needs to help you here to make sure your form is right, otherwise you won't get the correct draw length). Second, Draw it in your set up compound bow to check the draw length it is set at. Lastly, draw it in the same bow and use it to determine the arrow length that will be safe to use with your setup.
Draw Weight Scale
Many different varieties are available. Simple ones like this that are hand held...
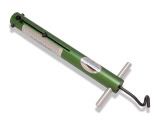
All the way up to digital versions, or ones that are mounted to the ceiling. They are handy if you want to know the exact weight you have your bow set to. However, not all that necessary. Example... Lets say your bow maxes out at 60#, and the company says you can adjust the draw weight by 2# per full turn of the limb bolts. Then you know that if you back the bolts out 3 turns each, then you just roughly set your bow to 54#. I don't think it is all that important to know that it might actually be 53.2#, or 55#. If you know within a pound I would say your are good. Just get those numbers from your bows manufacturer.
D-Loop Pliers
Last thing you want while our hunting, or anytime for that matter, is for your bow to fail. If you don't tighten your d-loop tight enough it is a sure fire failure point waiting to happen. The easiest way to tighten it is with a pair of d-loop pliers. These are specially made pliers designed to fit around a d-loop. Then when you squeeze the handle, instead of the two pieces closing tightly together, they spread. The formed head holds the knot ends in place while stretching out the loop and tightening the knots.
Example....

Well, that pretty well covers the most common tools you will need and see when it comes to setting up and maintaining your bow. I tried to be as comprehensive as I could, but there are quite a few gadgets out there, and I aim to cover all I can. Those will have to wait for another day however, so stay tuned for more. I'm going high tech in the next installment.
No comments:
Post a Comment